
Pillowcase dresses have a long history and have recently experienced a second burst of popularity as more and more people realise the charm and thriftiness of making children’s clothing at home.

Pillowcase dresses first made an appearance in the 1920’s and 1930’s when cash-strapped American families learned to make do and mend when it came to creating new frocks for their children!
In the days of the Great Depression it was common for families to receive chicken and cattle feed in large sacks, manufacturers of these sacks soon learned that the fabric from the sacks was being re-used by thrifty housewives and turned into simple garments and toys.
They responded to this by printing the sacks with basic but pretty designs of flowers, birds, people and animals…they knew that a buyer would possibly spend an extra halfpenny for a fancy feed-sack in order that they could re-purpose the sack for clothing.
The rough shape and size of these old feed-sacks is more or less the same as a modern day pillowcase and with a few simple adjustments, an old or new pillowcase can become a lovely dress for a toddler or a tunic top for an older child.
If you can sew by hand or machine, you will be able to make a lovely pillowcase dress in around half an hour.
What you need
- One pillowcase, cotton is best though mixed fiber will suffice
- Sharp scissors
- Bias binding
- Tailor’s chalk
- Narrow ribbon
- Small safety pin
- Rick Rack or other trim (optional)
Take your clean and pressed pillowcase and lay it on a flat surface; with your scissors, cut the sealed end off. Do not waste fabric when you do this, cut it as close to the hem as possible.
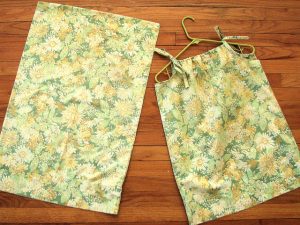
You now have a “tube” of fabric. If your pillowcase is of printed material then the pattern will dictate which open end becomes the hem and which the neck.
Turn the tube of fabric inside out and take your tailor’s chalk; on the top portion of the tube, draw two armholes…a half circle for each and then cut them out and snip along the “shoulder” area of the dress to open the top up.
Pin up your hem according to the length of dress desired and turn tube of fabric the right way around. Take your bias binding and pin it around the armholes. Stitch into place.
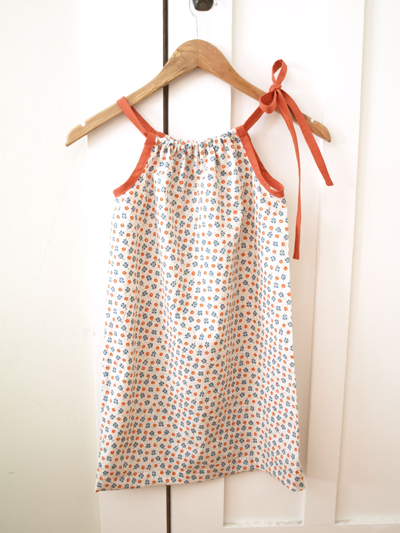
Sew a seam of half an inch around the neck area of the dress, leaving both ends open at the shoulders and then stitch the hem down. Take your ribbon and attach the safety pin to one end, thread it through the neckline and tie into a bow on either side.
Trim the hem of the dress with rick rack, lace or contrasting fabric. You can sew on a patch pocket it desired. Pillowcase dresses are fun and pretty as well as being cheap to make and comfy to wear.
Team them with leggings or jeans and in colder weather, pop a t shirt underneath.