Tips And Advice For Installing Subway Tiles To Your Home

Once you have purchased your subway tiles, the next stage is installing the tiles onto the walls of your home. This can be quite daunting, especially if you have never done this before. To help you with installing the tiles, we thought we would provide some advice to make this process as simple as possible.
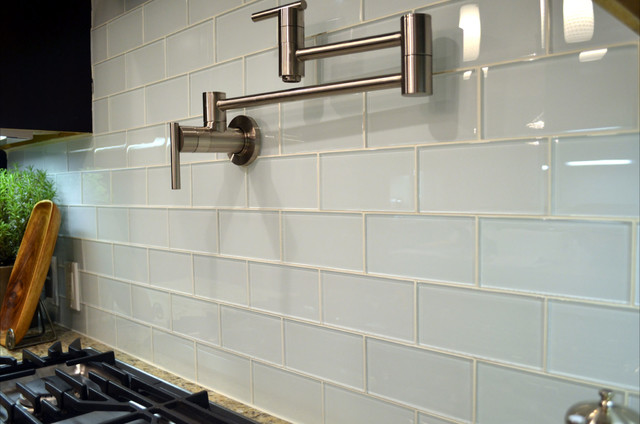
The most common size of subway tile is the tiles with 3 x 6 inch dimensions. There are others, such as 4 x 12, 2 x 6, and 2 x 4 inches, but 3 x 6 inch tiles are by far the most common. Let’s begin to take a look at the installation process for installing glass subway tiles in your kitchen.
The Importance of Using Tile Mastic
The first stage is to carefully apply tile mastic to the walls of the area that you are looking to tile. To make the process of applying the tile mastic to be as simple as possible, we would recommend that you make use of a notched trowel. These can be purchased from most hardware stores.
Install the Tiles One by One
The second stage is to apply each subway tile one by one. It is important to take your time and not to rush this process. Our top tip would be to begin the tiling process in the bottom left corner and creating a row of tiles along the bottom of the backsplash before moving onto the layer above. Central to the success of the installation is to use tile spacers. The job of these little spacers is to create a small gap between the countertop and the tile. Keep the spacers in place until the mastic has dried (around 24 hours).
Grout the Joints
The third stage is to put grout into the joints of each tile. For the best finish, we would recommend that you use a grout float, making sure to use the float at an angle to ensure no spaces are left. A haze develops over the tiles after a period of 15 minutes, which you can then wipe away. Wait another 24 hours for the grout to dry before moving onto the final stage.
Lastly, Apply the Caulk…
The last stage in the tile installation process is to apply the caulk to the backsplash. Make sure you have a caulking gun to hand to create a thin line of caulk around the border of the backsplash, before using a finger to smooth and mould the caulk to create the best look.
If you are still looking for the perfect subway tiles, check out Belk Tile, who have an excellent range of subway tiles for sale.