Free Data Recovery – Need Of The Decade

With the advent of social media over last decade, the data is multiplying exponentially over a period of time. Managing data has become a crucial aspect in one’s life. Let it be a corporate environment or personal use of computers, laptops, mobiles, disk, etc, all these devices are subject to deal with huge amount of data and managing it effectively is need of time.In such scenario, one has to have free data recovery software with him so that with no investment he/she can deal with losses that he/she may incur during manipulation of these data.
We have brought to our readers today an interesting Free data recovery tool today. This Data recovery tool is coming with various versions and solution. It comes as a Freeware and also Commercial. Following mentioned are the versions in which EaseUS Data Recovery Wizard comes for the end users.
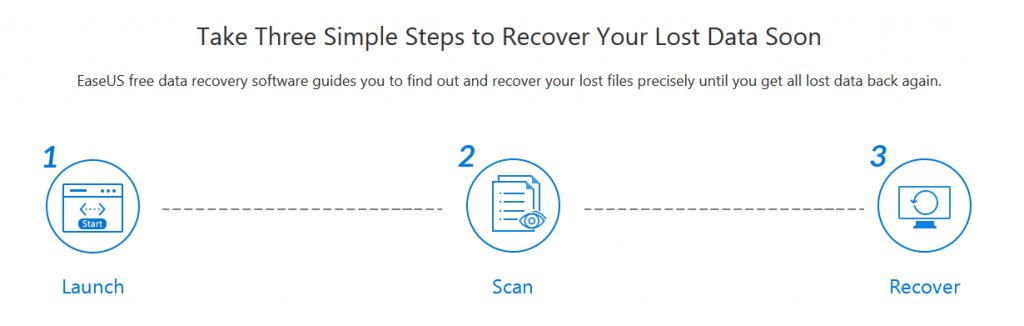
Recovery of Data is pretty simple with help of Free data recovery software. Below mentioned are three easy steps using which user can recover data from various sources of data loss.
Download the program and install on your device. Care must be taken that you do not install it on the device on which you have lost the data. Further one can select the type of lost data. Further one can select the location where he is looking to search the data.
During the scanning process is on, upper bar will show the progress to the user. Immediately next to the progress bar user can find a stop button. Using Stop he can terminate the searching process. There is an option of Deep Scan using which user can search data by sector scan.
After the scan results are displayed user can preview the recovered data and also recover those files that are available listed in the preview.
Hope you have found an interesting read today in terms of this software and in case of any suggestion we welcome in below comments.