<p style="text-align: justify;">
<p style="text-align: justify;">Joist hangers are important when it comes to making sure that beams in the garden, especially on the walls, are decked well so you can be sure that they’ll be able to hold the weight that they’re supposed to carry. That said, you have to make sure that these hangers are installed properly, or else they wouldn’t be able to do their job.</p>
<p style="text-align: justify;">How then do you install joist and beam hangers? Here’s what you have to keep in mind:</p>
<h3 style="text-align: justify;"><strong>1. Nail the Joists to the Ledger<br />
</strong></h3>
<p style="text-align: justify;">For this, you will need a 16d Galvanized Nail. Deck the head of the joist to the ledger by hammering it in. Make sure to use common nails if you’re working indoors, and use hot-dipped or galvanized nails if you’re working outdoors.</p>
<ul style="text-align: justify;">
<li>Start with the biggest hanger so everything will easily fit the ledger.</li>
<li>Use designated nail sizes to fill the flanges and keep on doing so until you’re able to hang at least 12 hangers.</li>
<li>Leave them be and don’t try to modify them—or else they’ll be weak and won’t hold the weight that they’re supposed to hold.</li>
</ul>
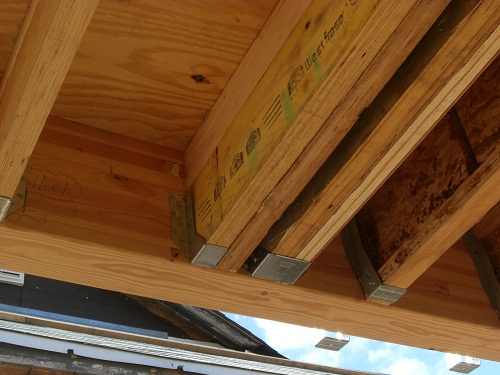
<p><img class="aligncenter size-full wp-image-13737" src="https://medusamagazine.com/wp-content/uploads/2015/04/joist-hangers.jpg" alt="How To Install Joist Hangers" width="500" height="375" /></p>
<h3 style="text-align: justify;"><strong>2. Establish the Hanger</strong></h3>
<p style="text-align: justify;">The next thing you have to do is squeeze the hanger around the joist itself. Then, you have to make sure that the speed prongs are driven into the board so that they’d be able to keep the joists in place. You also have to make sure that there are no gaps around the joist, whether over or under, and that everything is tucked into place—or you’d have to do this step all over again.</p>
<ul style="text-align: justify;">
<li>Make sure to use 3 ½ inch and 16d long nails for this.</li>
<li>Use thicker types of nails for the interiors. This means that you’d have to use 10d to 16d common nails so beams, headers, and ledgers would be secure.</li>
<li>For side ledgers, please use 1 to 1 ½ inch nails, which are also known as standard-sized nails. For double hangers, use nails in sizes of 8d to 10d and make sure that you penetrate the deepest flanges so that the hangers would be strong and would be able to withstand harsh weather conditions.</li>
</ul>
<h3 style="text-align: justify;"><strong>3. Nailing Time!</strong></h3>
<p style="text-align: justify;">Now, it’s time for you to make sure that those joints are fastened to the wall ledgers. Go on and fill all the flanges of the joists. You’ll know how much you need to fill up since the number is usually indicated in the manual, so don’t forget to consult that.</p>
<ul style="text-align: justify;">
<li>For double shear hangers, you’d have to nail around four 10d galvanized nails at 45 degree angles from the hanger all the way to the ledger board, and the joist, as well.</li>
<li>For standard joist hangers, avoid using nails longer than the standard 1 to 1 ½ inch size or else the wood—or wherever you’re hammering the nails are—might be splayed, and of course, you’d want to prevent that.</li>
</ul>
<p style="text-align: justify;">Garden decking is easy when you know how to install those joist hangers. Keep these tips in mind and you’ll surely be on the right track!</p>

How To Install Joist Hangers