<p><img src="https://medusamagazine.com/wp-content/uploads/2013/06/kitchen-cabinets.jpg" alt="kitchen cabinets" width="259" height="194" class="alignright size-full wp-image-4193" /><br />
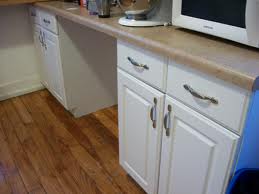
You don&#8217;t need to invest a large amount of money to have a brand new kitchen. There are a number of inexpensive projects that will improve the look of your home. One such project is resurfacing your cabinets. New cabinets can cost thousands, but it costs less than $100 to resurface old cabinets. Best of all, this is a project that any homeowner can complete.</p>
<h2><strong>Label and Remove the Doors and Hardware</strong></h2>
<p>One of the biggest mistakes you can make when doing this project is to forget to label the doors and hardware. Labeling makes it foolproof to replace the doors in the right locations. The easiest way to do this is to place masking tape of the back of the door that has been marked with the location. Hinges can also be taped to each door so that each piece is in the right location when the project is done.</p>
<h2><strong>Sand the Surfaces to Remove Previous Finish</strong></h2>
<p>Large flat cabinetry areas can be sanded with a power sander. Finer details will need to be sanded by hand. To limit the amount of dust in your kitchen, sand the doors and drawers outdoors. This means that you&#8217;ll only have to sand the faces of the cabinetry indoors. Remember after the sanding is done to run a damp cloth over everything to remove the dust before staining or painting.</p>
<h2><strong>Paint or Stain as Desired</strong></h2>
<p>Once your cabinetry has been properly sanded, you can stain or paint the cabinets as desired. For example, you might paint the doors of the bottom cabinets in chalkboard paint so that your child can draw on the cabinets while you make dinner. Painting the cabinets white will create a timeless look. Visit your local home improvement store for inspiration.</p>
<h2><strong>Change the Drawer Pulls and Handles</strong></h2>
<p>To complete your new look, invest in new drawer pulls and handles or paint the ones you already have. If you decide to reuse the pieces you already have, screw the pieces into cardboard and spray paint after thoroughly cleaning. This allows you to get a clean look without drips.</p>
<h2><strong>Reattach the Doors and Hardware</strong></h2>
<p>Once everything is dried, put the pieces back in place. For the best results, it pays to do the faces of the cabinetry and then do two or three doors at a time so that you can put everything back in place as you go.</p>
<p>You don&#8217;t have to spend a fortune on a new kitchen. This project is inexpensive, but will give you an amazing look. Then all you need to do is add a new coat of paint and new accessories for a brand new kitchen. Once the kitchen is done, you can focus on your door sweeps (to the outside if you have a kitchen back door) or on your next flooring or appliance project!</p>

DIY Home Improvement: Resurface Your Kitchen Cabinets